Installing & Flashing (Firmware Upgrade)
- Installing of Intel Edisson board drivers and ‘Intel XDK IoT Edition’ (also firmware upgrade) starts here https://software.intel.com/en-us/iot/hardware/edison/downloads or here https://software.intel.com/en-us/iot/downloads
- Chose to install Edisson Board installer. It allows also to install also ‘Intel XDK IoT Edition’ and other supported IDEs (Arduino/Eclipse)
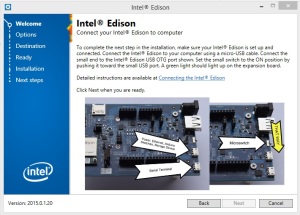
- You HAVE to have Edisson + Arduino Expansion board connected to your PC. To have it powered up you shall have one of the two: 12V/9C DC adapter or 2 mucro-USB cables going from your PC USB ports. Let’s say for your first installation you will HAVE to have those 2 USB to micro-USB DATA cables. Actually you need only 1 data cable connected to micro-USB client, but for elimination of issues with the next step let’s have only DATA USB cables.
- At the very beginning you may meet gray Next button that will prevent you from continuing the installation. This means, that you don’t have your Edisson board properly connected. Or one or both or one of you USB cables appeared as non-DATA (only power cables) not having RX-TX wires (but only 5V and GND).
- If this is only one – you are lucky: you may switch between the cables (port that was connected with power cable becomes connected with DATA cable) and you should have Next button unfreezing.
- If nothing happens when you switch cables you should look for at least one cable to be full USB cable. Other ways you will not be able to continue 🙁
Communicating Edison for the first time
PuTTY is a very useful tool as for connecting Edison for the first time trough COM as later for connecting through LAN using SSH or FPT protocols. If you already visit that PuTTY link take with you (I mean download) also PSFTP: we will need it to move files fro and thru Edison.
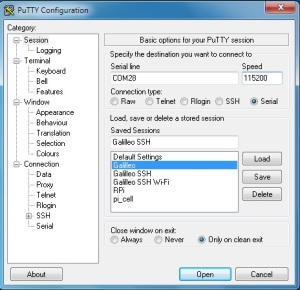
Check with Windows DeviceManager which COM ports were allocated for Edison:
Use regular USB port to connect with Putty using Serial connection settings. Click Open after all is set.
Once Putty Terminal window appeared you shall press Enter few times to have Edison login prompt appearing in the terminal. Use ‘root’ for name. There is no password set after fresh flashing of Edison firmware.
Configuring Edison: host-name, password, wi-fi
Note: To be able to use SSH and FTP protocols with Edisson you have to configure user password. Other-ways, connections will be refused.
To start configuring issue ‘configure_edison –setup’ command at Edison Putty terminal and follow satisfy the requests.
Using command ‘configure_edison –wifi’ you will be later able to configure wi-fi separately skipping the password and host-name configuration.
Comminicating Edison through Wifi
- SSH:
- Once you configured wi-fi, you can issue ‘ifconfig’ command to know your IP
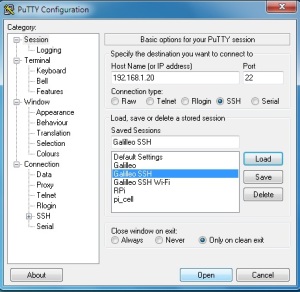
- To connect using ssh use PyTTY again
- FTP:
- Use psftp downloaded earlier to get ftp console.
- To connect Edison with ftp use command ‘open <Edison_IP>’ at FTP console
- Other useful ftp commands:
- lcd – change current directory at local host
- cd – change current directory at remote host (Edison in this case)
- put <local file> <remote folder>
- get <remore file> <local folder>
Development
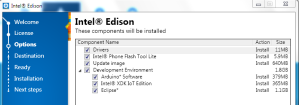
- If you are new with Edisson, I would propose to install at least Arduino IDE and ‘Intel XDK IoT Edition’. Don’t forget to mark appropriate check-boxes for appropriate options.
- Bonjour Print Service setup is initiated at first development attempt at IoT SDK. This service provides for automatic detection of IoT devices with multi-cast.
Useful links:
- https://software.intel.com/en-us/xdk/docs/lp-xdk-iot-edition
- https://software.intel.com/en-us/xdk/docs/using-the-editor-in-the-develop-tab
- Flashing Intel Edison (firmware upgrade)
- Installing Edisson




Pingback: Intel Edison: Simple HHTP server with IoT XDK | My Hobby of 'Making'