Step-by-step process
(one of possible ways to start using Galilleo Gen1 relatively fast)
1. Get HW/System components ready:
1.1. Get/make 5V DC power adapter
1.2 Get/make 3.5mm-DB9-USB (Audio-RS232-USB) cable
Links which will help you with that:
– DB9 to 3.5mm data cable specification – (ebay)
– Intel Community on RS232 and DB9
– Intel Community on Serial cable for Galilleo
1.3 Make boot SD-card:
Instructions on how to do so may be found at the following links:
– Windows
– Linux
1.4 Prepare Ethernet cable
You may also need Ethernet cable in our case. Of course in addition to home LAN’s router and home PC/laptop.
2. Assemble and Connect:
– Insert SD-card into socket
– Plug your 3.5mm-DB9-USB connector to Galilleo board’s audio jack from one side and to your PC’s USB from te other
– Connect Galilleo to your router throug standard Ethernet cable
– Connect your 5V power adapter to Galilleo first and then plug it into wall 220V-socket
You should see several LEDs ligting/blinking on the board. Some of them near the reset button.
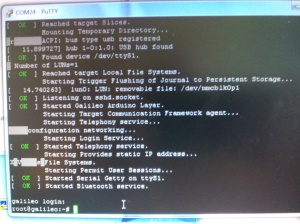
2.1 Connect through serial COM-port (RS232/UART) using PuTTY
PuTTY is a very useful tool as for connecting Galilleo for the first time trough COM as later for connecting through LAN using SSH protocol. If you already visit that PuTTY link take with you (I mean download) also PSFTP: we will need it to move files fro (to save in repo) and thru (something developed in comfortable environment) Galilleo.
Here is described how you can use PuTTY to connect Galilleo through serial port
Note: please make sure with Windows Device Manager that the baudrate/speed detected for Galilleo COM port is actually 115200.
Note: It might take you relatively long time to connect Galilleo so that you will miss all the boot-messages printed by Yokto linux from your SD-card. If you want to observe the reset process again, leave PuTTY connected and press reset button. You shall see lots of messages t the screen
Important: If after all the messages stopped you don’t see login-prompt try one of the following:
– Press ‘Enter’ button several times and check if login promt appears.
– If first didn’t work, restart PuTTY and then press ‘Enter’ several times for login prompt.
Important: Depending on which cable you have/built you may have issues with echo of the keys you press at the PuTTY screen. This what I had with my solution. Don’t hesitate, continue with your login and rest of the operations. If you have seen OS messages you should see command’s outputs on your terminal.
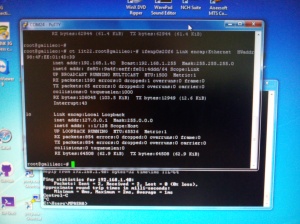
2.2 Connect Ethernet cable, Detect IP and move to SSH
SSH through Ethernet allows do the same you could do with serial port but in much faster and robust way.
Thus…
– Connect your Galiulleo to your home Router with Ethernet cable (w/o switching Galilleo off)
– in PuTTY terminal you already have enter command ‘ifconfig’+Enter until you will see IP address allocated to your board by your router
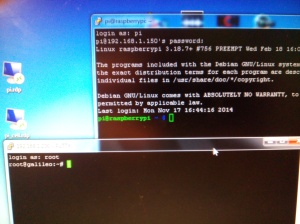
– from this point you may close your Serial PuTTY terminal and restart PuTTY again, but this time connecting to SSH using that IP you just discovered. Login with root+Enter and enjoy your Linux 🙂
3. Programming
– Python. By copying .py files into Galilleo with PSFTP and later activation with python <test.py> through SSH command line
– In google you will find lots Arduino sketches for Galilleo. Make sure you install Galilleo at Arduino IDE to be able to use them, Intel. Installing Galilleo Board at Arduino IDE


Pingback: Galilleo: LAN TCP communication with RaspberryPi using Python | My Hobby of 'Making'